How to Create a Professional Fashion Swatch Book

Every successful
fashion designer knows the power of touch. A professional swatch book transforms scattered fabric samples into an organized design toolkit that elevates your creative process and professional credibility. It serves as a quick reference to study textures, colours and patterns while developing a collection. Designers use swatch books to compare fabrics side by side, experiment with combinations and plan garments more effectively.
This tool brings structure to the creative process. No more searching through fabric piles. A well-organized swatch book helps designers select materials quickly and make confident choices. It also acts as a record of fabric details such as fibre content, weave, finish and supplier information, making sourcing easier for
future projects.
Students and professionals rely on swatch books not just to store fabric samples but to sharpen their understanding of textiles. Over time, it becomes a valuable resource that reflects a designers style and material knowledge. For anyone serious about
fashion design, creating a detailed swatch book is an essential step in building both creativity and technical skills.
What is a Fashion Swatch Book & Why You Need One?
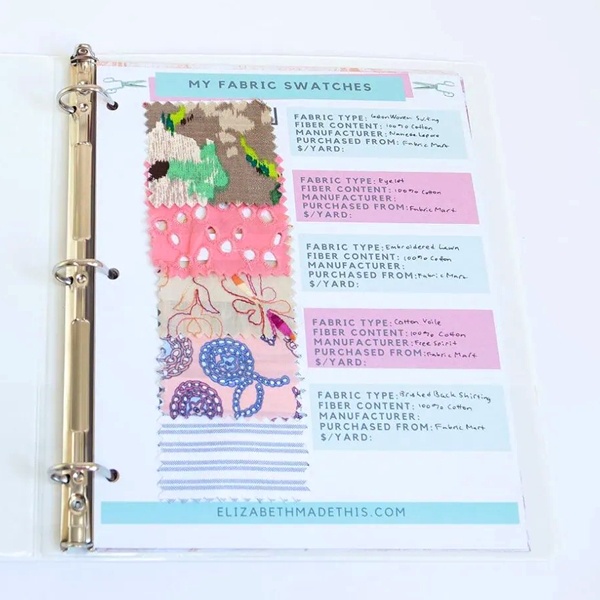
When you run your fingers across a fabric, you immediately sense something a screen can never show. A swatch book gives you that physical connection. The way a fabric drapes, the depth of its colour, the tightness of its weave - all these details become clear only when you see and touch the real sample. No digital image can capture the weight of
denim, the flow of chiffon or the roughness of raw silk. For designers, this tactile evaluation is not just helpful, it is essential.
In fashion education, swatch books act like silent teachers. Students learn how different fibres behave, how a cotton reacts compared to polyester or how a woven fabric differs from a
knitted one. By handling and comparing swatches side by side, they build a deeper understanding of fabric properties that theory alone cannot provide. This hands-on practice sharpens their ability to select the right material for the right design, a skill every successful designer needs.
From the industry's point of view, swatch books are practical tools for communication. Buyers, merchandisers and designers rely on them during sourcing decisions. A supplier may describe fabric quality, but a swatch eliminates doubt. It becomes the common reference point that ensures everyone talks about the same texture, finish and shade. In this way, swatch books
speed up decision-making, reduce errors and strengthen trust between designers and manufacturers.
The Evolution of Fashion Swatch Books through History
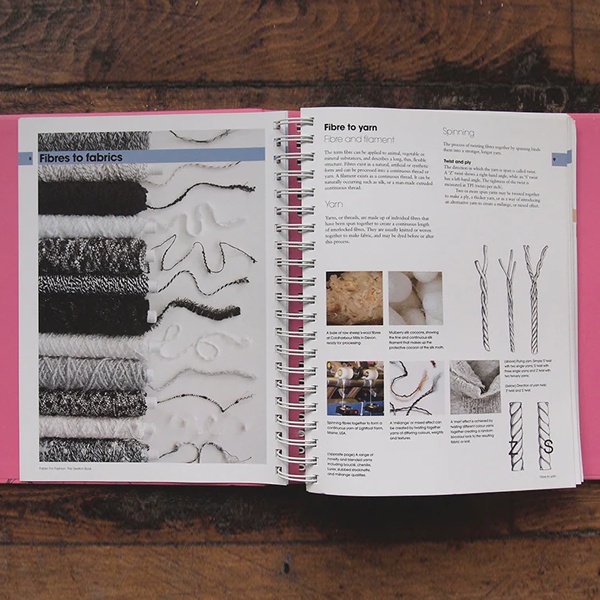
Swatch books have been a vital tool in the fashion and textile world for centuries. In the early days, textile mills created small fabric bundles to present new weaves, colours and finishes to merchants and dressmakers. These sample books, often stitched by hand, helped buyers compare fabrics before making bulk purchases. Designers later adopted the same practice, arranging lab-dips and trial samples in swatch books to test how dyes looked on different fibres. Over time, these collections became more refined, with fabrics arranged by weight, texture and weave to make
design choices easier.
By the twentieth century, swatch books had become a standard reference in fashion studios, allowing quick comparisons of colourways, finishes and fabric performance. They provided a tactile experience that could never be replaced by sketches or descriptions alone. Even with the rise of digital catalogues today, physical swatch books remain essential for understanding fabric qualities such as drape, opacity and hand feel.
What to Document in Each Swatch
Each swatch must include clear notes on its physical properties and performance. Here are the essentials to record:
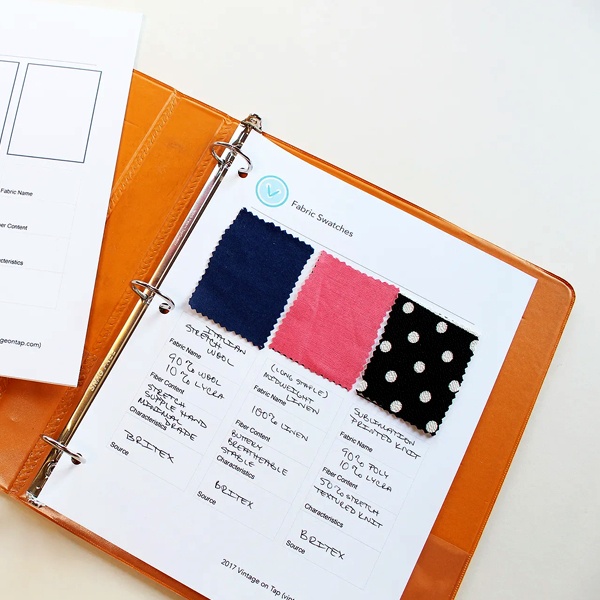
- Fibre Content - Write down whether the fabric is cotton, silk, wool, polyester or a blend. This detail affects comfort, durability and even dyeing behaviour.
- Thread Count and Weight (GSM) - Note the thread count for woven fabrics and the grams per square metre (gsm) for weight. These numbers tell you if the fabric is fine and delicate or strong and heavy.
- Weave or Knit Type - Mention whether it is plain weave, twill, satin, jersey or rib knit. The structure influences strength, texture and appearance.
- Stretch and Bias Behaviour - Check how much the fabric stretches along the grain and on the bias. Record this, as it decides how the fabric will drape on the body and fit a design.
- Drape and Hand Feel - Attach a quick note on how the fabric falls (stiff, fluid, crisp) and how it feels to touch (soft, rough, silky). These qualities guide design choices like pleats, gathers or flowy silhouettes.
- Colour Fastness - Do a simple rub test with a white cloth to see if colour transfers. Wash a small piece to check if it fades. Note the results.
- Shrinkage - Wash and dry a sample, then measure it against the original. Write down the percentage of shrinkage so you know if allowances are needed in cutting.
- Care Instructions - Mark whether the fabric requires dry-cleaning, hand wash or machine wash. Add notes on ironing or drying if the supplier provides them.
Quick Ways to Test Fabrics for your Swatch Book
- Rub Test - Rub the swatch with a white fabric to check colour bleeding.
- Wash Test - Wash a small piece to observe shrinkage and colour change.
- Drape Trial - Hang the fabric over a stand or your arm to see how it falls.
- Stretch Check - Pull along grain and bias to test elasticity.
Step-by-Step Process to Build your Fashion Swatch Book
Creating a swatch book is all about staying organised while making fabric exploration simple and enjoyable. Here is a clear step-by-step approach that fashion students and designers can follow:
1. Plan the Format
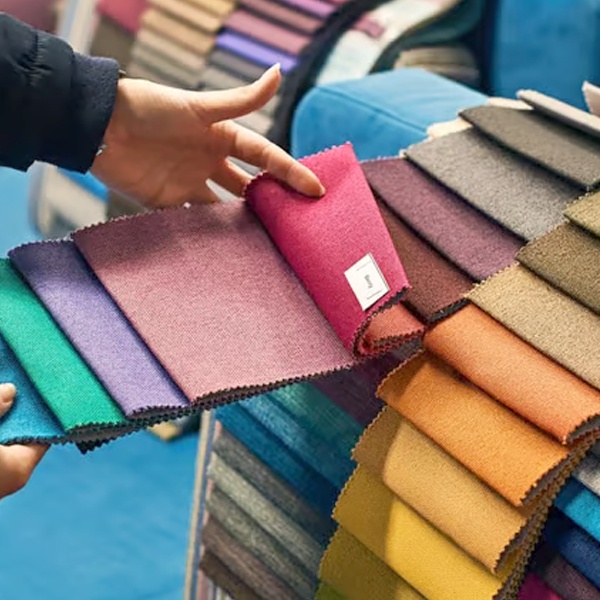
Decide on the size of your swatches before you begin. Most designers use anything between 2 X 2 inches and 6 X 6 inches. Smaller sizes save space, while larger ones show the fabric's drape and texture better. Use thick paper or cardstock as a base so your pages stay firm. Try different layouts-grid style, free form or grouped by fabric type - depending on how you want to present your collection.
2. Source your Samples
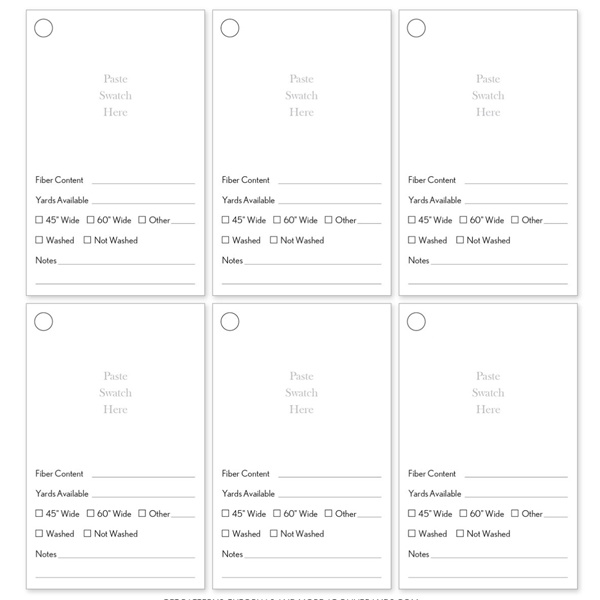
Collect fabrics from suppliers, textile markets or your own collection. Many suppliers will send sample swatches when requested. If you cut your own, use pinking shears instead of regular scissors. They prevent fraying and keep the edges neat. Always cut evenly for a professional look.
3. Use Templates for Consistency
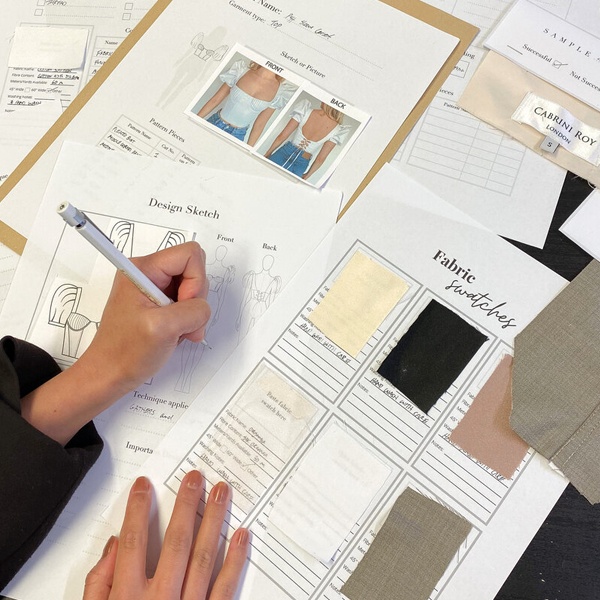
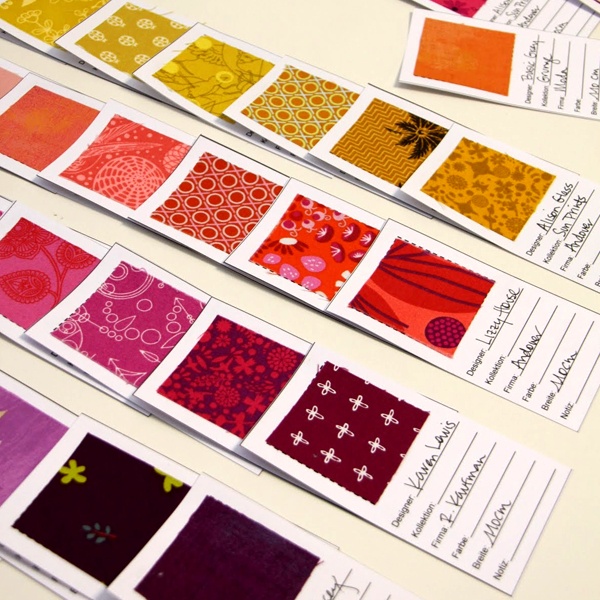
To avoid uneven swatches, print or draw a simple swatch placement template. This ensures every fabric square sits in the same spot, giving your book a clean and polished appearance. Templates save time and make large swatch books look uniform.
4. Attach the Swatches
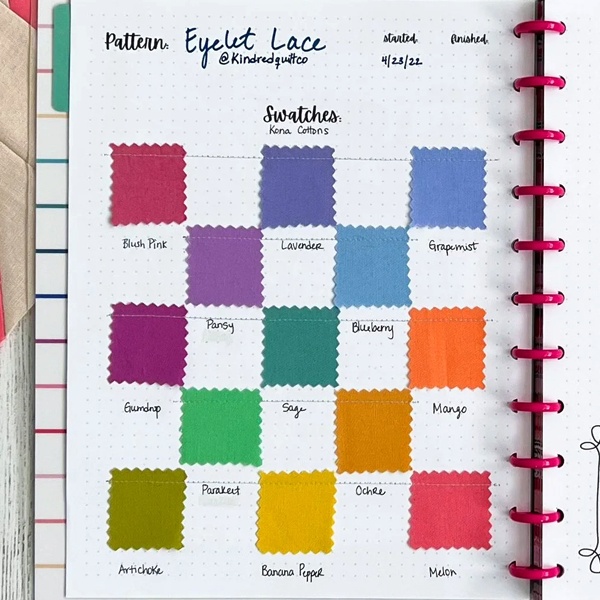
Choose a secure method based on your paper type:
- Double-sided tape for a flat and neat finish.
- Staples if you need a quick option.
- Plastic sleeves or pockets if you want to swap swatches later.
- Make sure the fabric sticks well and doesn't peel off when the pages are flipped.
5. Label and Index Clearly
Every swatch must carry basic information. Create a simple fabric code system (for example, C01 for cotton, S02 for
silk). Alongside the swatch, note details like fabric name, composition, source, price and width. Use an index page at the start that maps all codes to their details. This makes it easy to search and compare fabrics quickly.

6. Bind and Organise
Bring everything together with a binding style that
suits your needs:
- Ring binders let you add or remove pages easily.
- Spiral binding works well for compact books.
- Hardbound or leather covers give a professional finish.
Add tab dividers to separate fabrics by
fibre, colour, weave or theme. This structure makes your swatch book easy to navigate.
7. Add Digital Integration
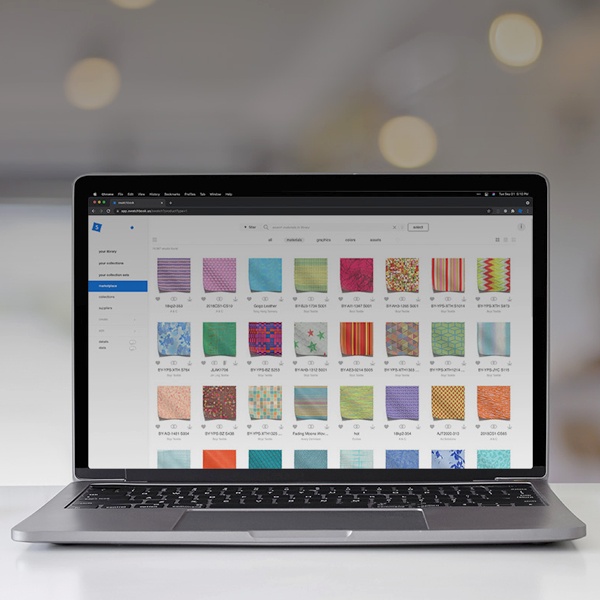
Modern swatch books often blend physical and digital. You can:
- Use QR codes beside each swatch, linking to supplier websites or care instructions.
- Explore platforms like Swatchbook to create a virtual fabric library that travels with you.
This way, your collection stays accessible both offline and online.
Building Skills through Swatch Books
A swatch book is more than just fabric samples glued on pages. For fashion students, it can be a smart educational tool to sharpen fabric knowledge and design thinking. Here are a few practical strategies that work well in the classroom.
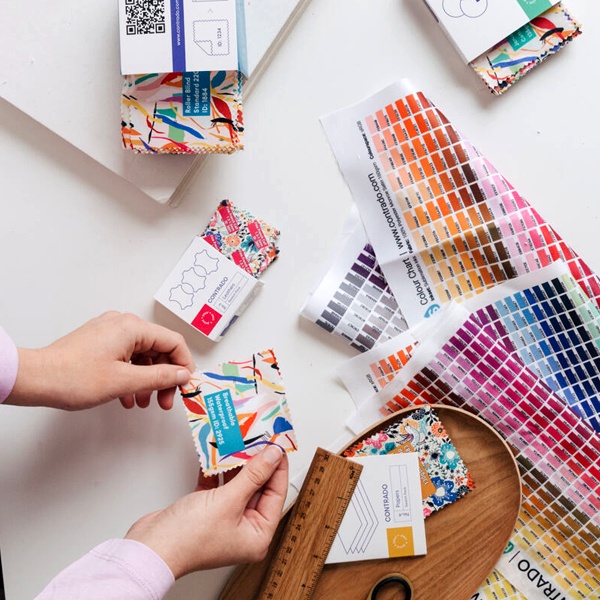
- Assignments for fabric recognition - Students can be asked to compare fabrics that look similar but behave differently. For example, comparing silk charmeuse with silk chiffon helps them understand how weave, weight and finish affect drape and texture. Simple exercises like stretching knits, checking grainlines in woven cloths or observing how fabrics crease train the eye and hand to recognise material qualities quickly.
- Adding experimental fabric sections - A swatch book should not stop at common cottons or silks. Encourage students to include advanced and experimental fabrics such as thermochromic textiles that change colour with heat, smart textiles that react to movement and sustainable fabrics like organic cotton, bamboo or recycled polyester. Documenting these alongside traditional materials widens design possibilities and builds awareness of future-ready textiles.
- Swatch exchange projects - Collaboration brings variety. A simple classroom activity is a swatch exchange where each student contributes a set of unique samples and swaps with peers. This way, everyone gains access to a wider range of fabrics without extra cost. It also builds teamwork and exposes students to materials they may not source on their own.
Professional Applications of a Swatch Book for Designers
A swatch book is not just a personal reference tool. In the
fashion industry, it plays an important role in professional communication and decision-making. Designers and brands use it at every stage of the design and production process to make sure ideas are clear and consistent.

- Client Presentations - During client meetings, a swatch book helps explain design ideas in a way that words or digital sketches cannot. Clients can touch the fabrics, see how colours look in real light and imagine the final garment more clearly. This builds trust and reduces confusion about the design vision.
- Supplier Audits and Fabric Sourcing - When working with suppliers, swatch books act as a standard guide. Designers can carry their book to compare fabrics during sourcing and ensure they match the brand's requirements. It also helps during audits, where the quality, weave and texture of fabrics must stay consistent across different batches.
- Seasonal Mood Boards and Collection Development - Every fashion season begins with a story or mood. Swatch books provide the material base for these mood boards, bringing together colours, patterns and textures that define the theme of a new collection. They guide the creative team in aligning fabric choices with the overall direction of the collection.
Sustainability & Ethical Sourcing in a Swatch Book
A swatch book can also show your commitment to the planet. Use offcuts and fabric scraps from past projects instead of throwing them away. This reduces waste while adding variety to your collection. Dedicate a section to eco-friendly fibres such as organic cotton, bamboo, jute and hemp. Add notes on their benefits like being biodegradable or water-efficient.
You can also record each fabric's lifecycle-whether it can be recycled, composted or reused. This keeps sustainability at the heart of your design choices. With these small steps, your swatch book becomes a creative and responsible design tool.
Personalisation & Creative Expression in your Swatch Book
A swatch book becomes special when it reflects your style. Personalise the cover with sketches, patterns, fabric cut-outs or your logo to make it unique. Inside, go beyond fabric pieces. Add mood board sketches, texture rubs or short notes that explain why you chose a fabric. Small quotes or keywords can capture your inspiration.
Use colour-coded tabs to organise by theme or season. Play with layouts, borders and illustrations to keep each section visually engaging. Treat every page as a mini canvas where fabrics, textures and ideas come together as your creative story.
Maintaining & Updating your Fashion Swatch Collection
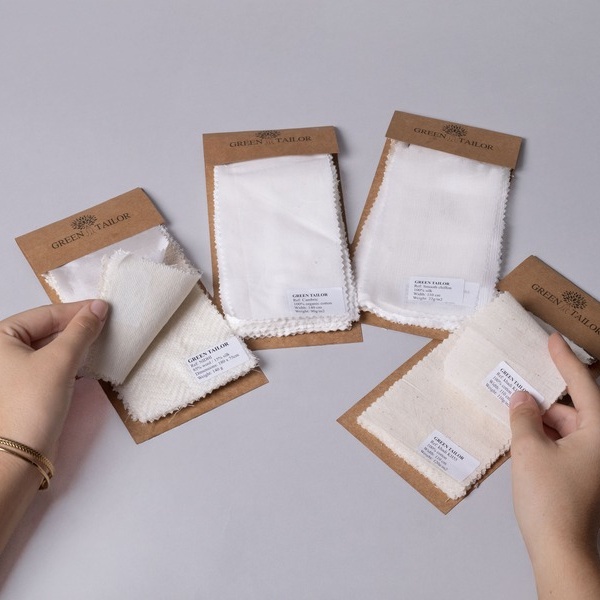
A swatch book works best when you treat it like a daily tool rather than a one-time project. Keep it within reach in your studio so you can flip through fabrics quickly while sketching or planning designs. If you carry it during shopping trips, it saves time when matching colours, textures or trims. This way, you avoid buying fabrics that clash with your collection.
Update it often. Fabrics go out of stock and
trends change, so remove outdated swatches and store them in a separate folder for reference. Add new samples straight away, before they get misplaced. A fresh swatch book always reflects your current style direction.
Think beyond paper too. Take clear photos of each page and store them digitally. A digital copy acts as backup if the original gets damaged and makes sharing with clients or teammates much easier. Regular care keeps the book neat. Use sturdy sheets, fix swatches with proper adhesive or
stitching and label everything clearly. Over time, this simple routine turns your swatch book into a reliable design companion that grows with your fashion journey.
A swatch book is more than fabric samples. It guides designers through couture, ready-to-wear and experimental work, keeping ideas organised and accessible. For students, it is an educational tool to study fabrics and colours. For professionals, it becomes a creative partner and personal archive, preserving valuable references for future use.
Unlike digital images, it lets you feel textures, ensuring accurate choices. Over time, it reflects your growth as a designer and serves as a steady companion in a fast-
changing fashion world.
FAQ about Swatch Book
1. Where can fashion students source fabric swatches in India affordably?
Visit local fabric markets, handloom stores or online fabric shops. Many sellers will send small pieces if you ask clearly.
2. What is the ideal fabric swatch size to prevent fraying?
Cut 3 X 3 or 4 X 4 inch pieces. Use pinking shears or seal the edges to stop fraying.
Write the fabric name, fibre, weave, region and if it has a GI tag.
4. How can students save money?
Use a ring binder with thick cards. Add a few swatches each week instead of all at once.
5. How to protect swatches in monsoon?
Store with silica gel, air the book often and use breathable covers.
6. Which glue works in heat and humidity?
Use acid-free tape or glue dots. Avoid glue sticks; they don't last.
7. Can I add branded fabrics?
Yes, for study. Avoid showing logos in public
portfolios.
8. How to take clear swatch photos?
Click in daylight, place a grey card next to it and keep your phone straight.
9. What simple tests can I do at home?
Try rub tests, quick wash tests, crease recovery and drape
checks.
10. How to know GSM without a cutter?
Weigh a 10 X 10 cm piece on a kitchen scale and calculate. Mark it as 'estimated'.
11. Where to test fabrics in India?
Use NABL-accredited textile labs for basic reports.
12. What details to collect from suppliers?
Name, contact, fabric code, price, width and lead time.
13. How to arrange fabrics for Indian weather?
Group by use like summer wear, festive wear or travel-friendly fabrics.
14. How to include hand-print or dyed fabrics?
Add notes on base cloth, dyes, maker and wash care.
15. How to save cost when swatches are charged?
Share orders with classmates and return larger hangers after photos.
16. How to store heavy or delicate fabrics?
Keep them in pockets and mark 'handle carefully.
17. What is a good portfolio layout for students?
Show 4-6 swatches with details and a small mood strip.
18. How often should I update the book?
Every three months. Move old swatches to an archive binder.
19. How to store natural-dyed fabrics?
Keep away from sunlight and wash gently.
20. Why note fabric width?
Widths vary (44/45 vs 58/60 inches). This helps plan fabric needs.
21. Can I include laces and trims?
Yes. Label material, width and care tips.
22. How to prepare for digital use?
Click flat and crumpled photos, note sheen, texture and opacity.


 CONTACT USWaves Institute of Fashion Designing,